JPG to PDF
Convert your JPG images to a single PDF file.
Drag & drop your JPG images here
or click to choose from your device
How to Convert JPG to PDF Online
- Open the JPG to PDF tool and add your images — drag them in, browse for them, or paste from the clipboard with Ctrl+V.
- Arrange them into the order you want by dragging the thumbnails, or apply a Sort By rule such as Name or Date.
- Choose a page size and orientation, or pick Fit to image size if the PDF is only for screen viewing.
- Set the margins and the image fit — Fit to page is the safe choice when you do not want anything cropped or stretched.
- Leave Maintain image quality ticked unless you need a smaller file, and add page titles or numbers if the document needs them.
- Click Generate PDF. The document is assembled in your browser, so the images are not sent to Pixpoo’s servers.
- Download the PDF and check the page order and framing before sending it on.
Want a more detailed walkthrough? Read the full step-by-step guide →
Convert Multiple JPG Images to One PDF
Upload multiple JPG images and combine them into a single PDF. Arrange the images in the order you want, choose the page size and orientation, then generate one PDF containing all your images.
Convert Images to PDF Online
Turn your images into a single PDF directly in your browser. JPG, PNG, WebP, GIF and BMP images can be combined into one document and arranged in the order you need.
Convert Photos to PDF
Turn photos of documents, receipts, forms or other images into a PDF that is easier to submit, print or share. Add multiple photos and arrange them in the correct page order before generating the PDF.
JPG to PDF online — free, fast and private
Convert JPG, PNG and WebP images into a single PDF. With Pixpoo you can convert JPG to PDF online for free, right in your browser — no sign-up, no watermark, and your files are processed locally rather than sent to Pixpoo’s servers.
About JPG to PDF
Converting images to PDF means placing each picture onto its own page in a single document. Pixpoo lays the images out in the order you arrange them, sizes each one onto the page according to the fit and margin settings you choose, and writes the result as one PDF. JPG, PNG, WebP, GIF and BMP files are all accepted despite the tool’s name, and you can mix formats freely in the same document.
The reason to do this is almost always that a PDF is the unit other people accept. Photographs of receipts are a dozen loose files until they are one expense claim. A passport, a visa and a bank letter are three phone photos until an application portal wants a single attachment. Scanned pages captured with a camera stay a camera roll until someone needs to read them in order. PDF also fixes the page geometry, so what you send is what the other person sees.
One detail is worth understanding because it decides how good the output looks. With Maintain image quality ticked, a JPG is written into the PDF completely untouched — the original JPEG data is stored as-is, byte for byte. A PNG is handled slightly differently: it is decoded and re-stored with lossless compression, so the pixels are identical and transparency is preserved, but the bytes are repacked rather than copied. Either way there is no quality loss. Untick the box, or use a format other than JPG or PNG, and images are redrawn and saved as JPEG instead, which is where a size saving comes from and where quality is traded away.
When should you convert images to PDF?
Combining images into a PDF is worth doing whenever the pictures need to travel as one document. Common cases:
- Turning photos of receipts into a single expense claim
- Submitting several ID or supporting documents where a portal accepts one file
- Sending a set of scanned or photographed pages in the right reading order
- Assembling a photo contact sheet, portfolio or moodboard for a client
- Attaching evidence photos to a report or insurance claim as one attachment
- Archiving a batch of images in a format that fixes page size and order
JPG to PDF options explained
The settings decide the shape of the finished document and how each image sits on its page. Here is what each one does and when to change it.

Arranging and ordering images
Sets the page order. Drag thumbnails to rearrange them, use the arrows to nudge a selection one position, or pick a Sort By rule — Custom Order, Name or Date, newest first. Blank Before and Blank After insert an empty page, and Delete removes an image from the document.
Sorting by Name is the quickest fix when a camera or scanner has produced sensibly numbered files and the upload order came out wrong. Use Custom Order when the sequence is editorial rather than alphabetical. Blank pages are mainly for double-sided printing, so each new section starts on a fresh sheet. Every change is covered by Undo and Redo.
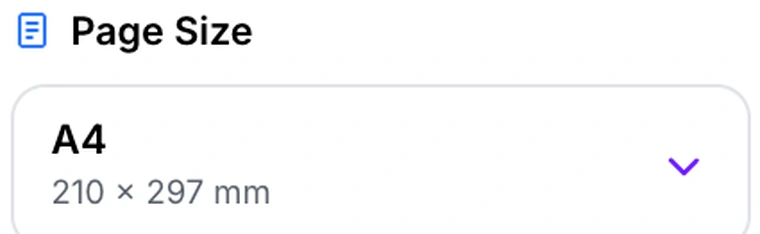
Page Size
Chooses the paper size for every page: A4, Letter, Legal, A3 or A5. There is also a Fit to image size option, which makes each page exactly the dimensions of the image on it.
Pick a standard size when the document will be printed or submitted somewhere — A4 nearly everywhere, Letter in North America. Choose Fit to image size when the PDF is only going to be viewed on screen and you would rather have no borders at all: every page then matches its picture, so a mix of portrait and landscape photos each get their own shape instead of being letterboxed onto a common sheet.
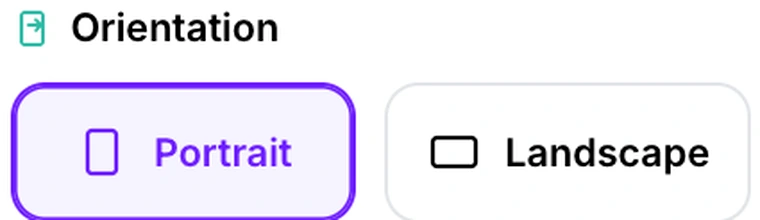
Orientation
Switches the chosen page size between tall and wide. It applies to every page, and has no effect when Page Size is set to Fit to image size.
Match it to the majority of your images. Portrait suits phone photos and scanned documents; Landscape suits camera photos, screenshots and anything wider than it is tall. If your set is genuinely mixed, Fit to image size usually beats forcing everything one way.

Margins
Sets the white border around each image: None places it edge to edge, while Narrow, Normal and Wide add progressively more space.
None is right for photo books and full-bleed images viewed on screen. Normal is the safe choice for anything printed, since most desktop printers cannot print to the paper edge and will clip whatever sits too close to it. Wide is worth it when pages will be hole-punched or bound, or when you have turned on page titles and want them to breathe.
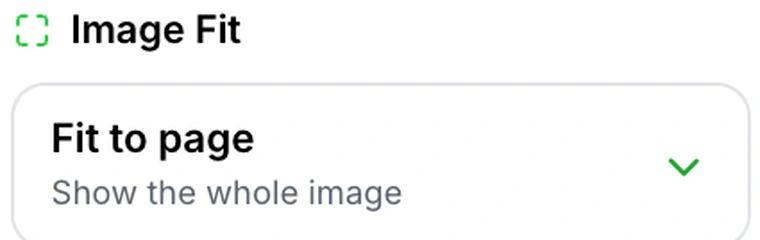
Image Fit
Decides how each image is scaled onto its page. Fit to page shows the whole image inside the margins. Fill page crops the edges so the picture covers the page completely. Actual size places the image at its native dimensions. Stretch to page forces it to the full page and will distort it.
Fit to page is the sensible default and the only one that never loses or warps anything — expect white space when the image and page shapes differ. Use Fill page for photo layouts where a clean full-page look matters more than the edges of the picture. Actual size suits scans captured at a known scale. Stretch is there for completeness; it changes the proportions of the image, so avoid it for anything with faces, text or straight lines.
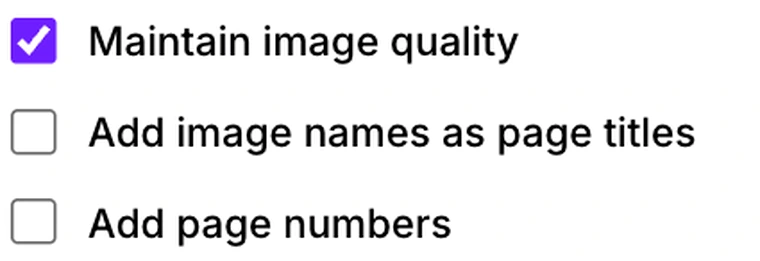
Maintain image quality, titles and page numbers
Maintain image quality, on by default, embeds JPG and PNG files into the PDF unchanged rather than re-encoding them. Add image names as page titles prints each filename above its image. Add page numbers prints a number on every page.
Leave Maintain image quality on unless the PDF is too large to send: it is what makes the conversion genuinely lossless for JPG and PNG, and what preserves PNG transparency. Unticking it re-encodes everything as JPEG and caps images at 2000 pixels on the long edge, which shrinks the file considerably but cannot be undone. Page titles are useful for evidence bundles and expense claims where the original filename is part of the record. Page titles use a standard font that only covers basic ASCII, so é, ü and any non-Latin script come out as question marks.

Adding images by paste
As well as dragging files in or browsing for them, you can paste an image straight from the clipboard with Ctrl+V, or Cmd+V on a Mac.
This is the fastest route for anything that is not already a file on disk — a screenshot you just took, an image copied from a web page or a chat, or a crop from another application. It saves the round trip of saving to disk first, and pasted images join the same arrangement list as uploaded ones.
Why use Pixpoo for JPG to PDF?
- Truly lossless for JPG and PNG — no re-encoding, so no generational quality loss
- PNG transparency is preserved rather than being flattened onto white
- Mix JPG, PNG, WebP, GIF and BMP in the same document
- Drag to reorder, sort by name or date, and insert blank pages, all with undo
- Paste screenshots straight from the clipboard instead of saving them first
- Runs in your browser — your images are not sent to Pixpoo’s servers
JPG to PDF features
JPG to PDF limitations
Images are placed onto pages; no text is generated, so the resulting PDF is not searchable and its content cannot be selected or read by a screen reader unless you run it through OCR afterwards. Page titles are drawn using a standard font, so characters outside basic ASCII — including accented Latin characters such as é and ü — are replaced with question marks. With Maintain image quality unticked, images are downscaled to a maximum of 2000 pixels on the long edge and saved as JPEG, which flattens PNG transparency onto white. Very large batches are limited by your device’s memory rather than by a server quota. Format handling is decided by the file extension, so an image saved with the wrong extension — a PNG named .jpg, for instance — can fail to embed.
Common JPG to PDF questions
How do I convert JPG to PDF?
Add your images, arrange them into the order you want, choose the page size and fit settings, then click Generate PDF. Assembly happens locally and the download starts the moment it finishes.
Can I convert several images into one PDF?
Yes — that is the normal use. Each image becomes its own page, in the order shown in the arrange panel. There is no fixed limit on how many you can add; the practical ceiling is your device’s memory.
Does converting reduce image quality?
Not with the default settings. Maintain image quality is on out of the box, and while it is on a JPG or PNG goes into the document untouched — no re-encoding, so no generational loss. Turn it off and images are redrawn as JPEG and capped at 2000 pixels on the long edge, which is how the file gets smaller.
Which image formats can I use?
JPG and PNG are handled losslessly. WebP, GIF and BMP are also accepted, but because they cannot be embedded directly they are converted to JPEG on the way in. You can mix formats in one document.
Is PNG transparency preserved?
Yes, as long as Maintain image quality is ticked — the PNG is embedded with its alpha channel intact. If you untick it, the image is redrawn as JPEG, which has no transparency, so transparent areas become white.
How do I change the order of the pages?
Drag the thumbnails in the arrange panel, or use the up and down arrows to move a selected image one position. You can also apply a Sort By rule — Name, or Date with the newest first — and then adjust by hand from there.
What is the difference between Fit, Fill, Actual size and Stretch?
Fit shows the whole image inside the margins and may leave white space. Fill covers the page completely and crops whatever does not fit. Actual size uses the image’s native dimensions. Stretch forces the image to the page and distorts its proportions, so it is best avoided for photos.
Can I add a blank page between images?
Yes. Select an image and use Blank Before or Blank After to insert an empty page at that point. This is mostly useful for double-sided printing, so that each section starts on a fresh sheet.
Can I paste a screenshot instead of uploading a file?
Yes. Press Ctrl+V, or Cmd+V on a Mac, to paste an image straight from the clipboard. It joins the arrangement list exactly like an uploaded file, which saves saving the screenshot to disk first.
Is the text in my images searchable in the PDF?
No. The PDF contains pictures, not text, so nothing in it can be searched or selected. If you need searchable text from a scanned page, run the finished PDF through the OCR PDF tool afterwards.
Is the JPG to PDF tool free?
Yes. JPG to PDF with Pixpoo is completely free — no sign-up, no watermark, no usage limits and no paid plan. It runs entirely in your browser, so there is nothing for us to meter.
Are my files uploaded to a server?
No. When you use JPG to PDF, your files are processed in your browser and are not sent to Pixpoo’s servers — Pixpoo does not upload or store them.
Related tools: PDF to Word, PDF to JPG, Word to PDF, PDF to PNG. All PDF tools →