Watermark Image
Lay your own text or logo across a picture,
at the size, angle and opacity you choose.
7 easy ways to add an image
Add an image from anywhere. Fast, simple and flexible.
- 1Drag & dropDrop your image right here
- 2Choose from deviceBrowse your computer
- 3Copy & pasteCopy an image from a webpage or screenshot and paste it here
- 4Google DriveImport from Google Drive
- 5DropboxImport from Dropbox
- 6From LinkPaste an image link (URL)
- 7Scan QR CodeUpload from your mobile
How to add a watermark to an image
- Drop in the picture you want to mark.
- Type your text, or upload a logo — or press a preset to start from a sensible setup.
- Drag the mark where you want it, then set size, opacity and angle.
- Press Download watermarked image.
Want a more detailed walkthrough? Read the full step-by-step guide →
Add a watermark to an image — free, fast and no watermark
Free online watermark tool — add a text or logo watermark to any JPG, PNG or WebP image. Two independent layers, nine positions, tiling and rotation, composited in your browser — a PNG, JPEG or WebP download never leaves your device. No sign-up, no watermark from us.
How your image is processedYour watermark is composited in your browser, and a PNG, JPEG or WebP download never leaves your device. Only AVIF, GIF and TIFF output is sent to our server to be encoded, and even then the file is held in memory for the length of the operation and is not stored.
About Watermark
A watermark is a claim of authorship laid over a picture. It does not stop anyone copying the file — nothing does — but it makes the copy carry your name wherever it travels, which is usually the point. A photograph that circulates without attribution is lost; one with a mark in the corner keeps pointing home.
The tension is always the same. A watermark visible enough to survive being cropped or screenshotted is intrusive enough to spoil the picture, and one discreet enough to ignore is easy to remove. Where you land depends on what you are protecting: a portfolio image wants a light corner signature, a proof sent to a client wants something no one could publish by accident.
This editor gives you two independent layers — text and a logo — that sit on the picture together, each with its own position, size, opacity and angle. Everything is composited at full resolution, so what you place on a preview of a 3000-pixel photograph lands on the 3000-pixel file.
When a watermark earns its place
Any time an image will travel further than the person you sent it to.
- Photography going onto a portfolio, a client gallery or social media.
- Proofs sent before payment, where a heavy tiled mark is the point.
- Product shots that competitors are known to lift.
- Internal documents and mock-ups that must be marked confidential.
- Anything published where you would like credit to follow the picture.
Watermark options explained
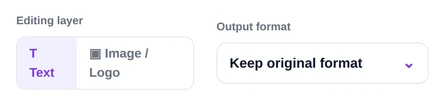
The presets are the quickest way in; everything below them adjusts one of the two layers, and the layer you are editing is whichever one is selected.
Watermark presets
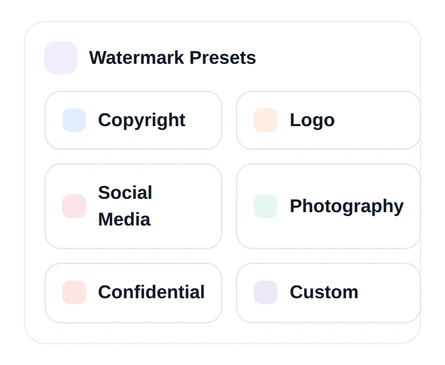
Six starting points that fill in the text, the opacity, the size and the position together. Copyright places “© Your Name” bottom-right at 60% opacity. Social Media puts “@yourhandle” bottom-centre at 80%. Photography sets “Photo © Studio” bottom-left at 55%. Logo switches to the image layer at 70%. Confidential is the outlier: large text at 35% opacity, centred, tilted −30° and tiled across the whole picture. Custom leaves everything to you.
Start from whichever is closest and adjust — none of them is a final answer, because the right opacity depends on how busy your picture is. The two ends of the range are worth understanding: Photography at 55% is deliberately easy to ignore, which is what you want on a portfolio piece, while Confidential is deliberately impossible to ignore, which is what you want on something nobody should publish.
The two layers
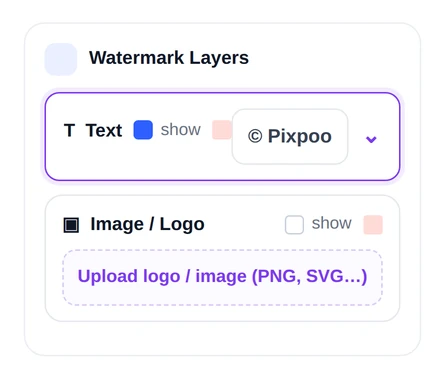
A text layer and an image layer, independent of one another. Each has its own visibility tick, its own delete button and its own complete set of position and style settings. Click one to bring the controls onto it; the panel heading tells you which you are editing.
Most jobs need only one. Use both when a logo and a line of text belong together but not in the same place — a mark bottom-right and a studio name bottom-left, say. The important thing to understand is that they genuinely coexist: switching the controls to the logo does not turn the text off, and the picture you download carries whichever layers are ticked. The logo layer accepts any image you upload, so a PNG with a transparent background is what you want there — a JPEG logo brings its white box along with it.
Opacity, size and tiling
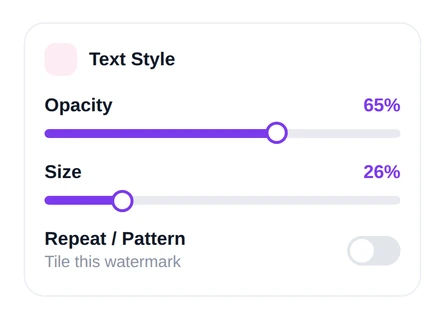
Opacity runs from 0 to 100. Size is a percentage of the picture’s width, from 5 to 100 — so a setting of 20 on a 3000-pixel-wide photo gives a mark 600 pixels across, and the same setting scales sensibly on a small image. Repeat / Pattern tiles the mark across the entire frame instead of placing it once.
Somewhere between 50% and 70% opacity is legible without dominating on most photographs; drop lower on pale or busy images where the mark would otherwise shout. Size is the more common mistake — a mark at 20% of the width is already substantial. Tiling is a different tool for a different job: it is for proofs and confidential material, where the mark is meant to obstruct. Note that a tiled mark covers the whole picture, so the position and edge-distance settings no longer apply to it.
Position and rotation
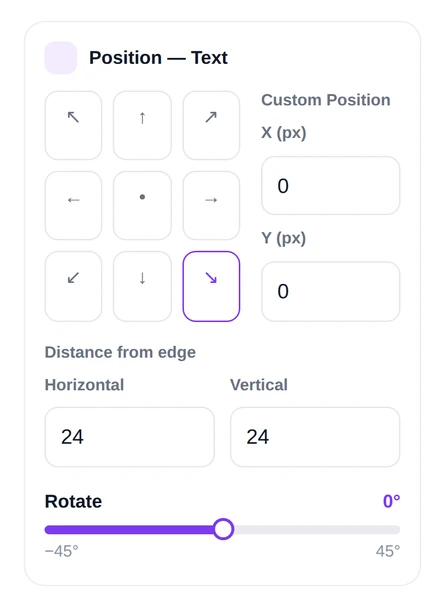
Nine anchor buttons for the corners, edges and centre, a pair of exact X and Y coordinates, two edge-distance fields defaulting to 24 pixels, and a rotation slider from −45° to +45°. You can also simply drag the mark on the picture, which switches it to custom coordinates.
Anchors for speed, coordinates for repeatability across a set of images. The edge distances are measured in the picture’s own pixels, not screen pixels, which matters more than it sounds: 24 pixels is a comfortable margin on an 800-pixel image and almost touching the edge on a 3000-pixel one. On a 3000×2000 photo at size 20 we measured the bottom-right anchor placing a 600×192 mark at (2376, 1784), and the same settings top-left placing it at (24, 24). Scale the distance with the picture if you are working across very different sizes.
Output format
What the download is written as, defaulting to your original format. This choice also decides where the work happens: PNG, JPEG and WebP are composited and encoded entirely by your browser, while AVIF, GIF, TIFF and the two JPEG 2000 and JPEG XL options send the finished image to the server to be encoded there.
Stay on PNG, JPEG or WebP unless you have a reason not to — the file then never leaves your machine, which we confirmed by watching the network while producing one. WebP is the sensible default for anything going online, and JPEG for maximum compatibility. Avoid PNG for photographs here: the browser writes full-colour PNG with no palette reduction, and our 3.6 MB test photograph came back at 16.5 MB.
Quality, file size and filename
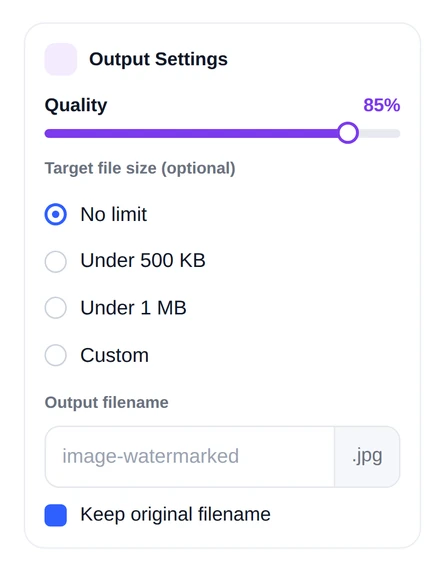
A quality slider defaulting to 85, an optional file-size ceiling of 500 KB, 1 MB or a figure of your own, and the download’s name — which keeps your original by default, with “-watermarked” appended.
Quality 85 is a good balance on photographs; our test image came out at 2.1 MB as JPEG and much the same as WebP. Reach for the ceiling when something downstream states a limit: the tool encodes repeatedly and returns the largest version that fits underneath, which we checked against an exhaustive sweep of every quality level — across sixteen different ceilings it found the best available every time. Two things to know. It cannot beat what the lowest quality setting produces, so a very tight target on a large picture is refused by arithmetic rather than by the tool. And it does nothing at all for PNG, which has no quality dial to search.
Why use Pixpoo for Watermark?
- Text and logo watermarks as separate layers, both live on the image at once.
- Nine anchor positions, free dragging, or exact pixel coordinates.
- Opacity, size and a −45° to +45° rotation, plus tiling across the whole frame.
- PNG, JPEG and WebP are produced entirely in your browser and never uploaded.
- Six starting presets for copyright, logo, social, photography and confidential marking.
Watermark features
Watermark limitations
What a watermark can and cannot do for you. It is a deterrent and an attribution, not protection: anyone determined enough can crop a corner mark off or paint it out, and a light one is easier to remove than a heavy one. The text layer is drawn in white with a soft shadow, at a weight and typeface chosen for legibility, so there is no font or colour picker — a logo layer is the route to a specific look. Tiling covers the whole frame and therefore ignores the position settings. Pictures are handled one at a time rather than as a batch. And the file-size ceiling applies only to the lossy formats, and cannot go below what the lowest quality setting yields.
Common Watermark questions
Is my image uploaded when I add a watermark?
For PNG, JPEG and WebP, no. The picture is drawn onto a canvas inside your browser at full resolution, encoded there and handed straight to your downloads folder — we watched the network during a complete run and it made no requests at all. The exception is the less common formats: choosing AVIF, GIF, TIFF, JPEG 2000 or JPEG XL sends the finished, already-watermarked image to Pixpoo’s server to be encoded, because browsers cannot write those. Even then it is processed in memory and never stored. If you would rather nothing ever left your machine, stay on the first three.
How do I add a watermark to a photo?
Drop the photo in, type your text into the text layer or upload a logo image, then drag the mark where you want it and set the opacity. Pressing a preset first saves a step — Copyright, Social Media and Photography each place a sensible mark you can then adjust. When it looks right, press Download watermarked image.
What opacity should a watermark be?
Between about 50% and 70% works on most photographs: readable when someone looks for it, quiet enough not to ruin the picture. Go lower on pale or minimal images, where a mark of the same opacity reads much louder. The presets bracket the useful range deliberately, from Photography at 55% to Social Media at 80%, with Confidential sitting far outside it at 35% but tiled across the entire frame — low opacity, total coverage.
Can I use my own logo as a watermark?
Yes. The image layer takes any picture you upload and places it exactly like the text layer, with its own size, opacity, position and rotation. Upload a PNG with a transparent background wherever you can — a logo saved as JPEG carries its white rectangle onto your photograph, which almost never looks right. There is a Keep aspect ratio option so the logo is not stretched when you resize it.
Can I put a watermark across the whole image?
Turn on Repeat / Pattern and the mark is tiled edge to edge instead of placed once. That is the setting behind the Confidential preset, which pairs it with a −30° tilt and low opacity. It is the right choice for client proofs and anything that must not be published by accident, and the wrong choice for a portfolio image, because it is meant to get in the way. Tiling ignores the position and edge-distance settings, since the mark is everywhere.
Does watermarking reduce the image quality?
The picture is re-encoded once, so a lossy format costs a little — quality 85 is the default and is visually safe on photographs. What it does not do is scale anything: the mark is composited onto the original pixels at full resolution, so a 3000-pixel photograph stays a 3000-pixel photograph. Worth avoiding PNG for photographs here, though; the browser writes it at full colour depth and our 3.6 MB test file came back at 16.5 MB.
Will my camera and location data survive?
No, and that is not an option here. The picture is redrawn onto a blank canvas before the mark is added, and a canvas holds nothing but pixels — the EXIF block, including any GPS coordinates, has nowhere to go. We confirmed it on a photo carrying location tags, and the download contained no metadata block at all.
Can a watermark be removed?
Yes, by anyone willing to spend the effort — cropping removes a corner mark in seconds, and modern editing tools can paint out a light one. That is worth being honest about. A watermark raises the cost of casual theft and makes attribution travel with the picture; it is not a lock. If the image genuinely must not circulate, tiling at a visible opacity makes removal tedious enough to deter most people, at the cost of a picture nobody can enjoy.
Does it work on a phone?
Yes. The tool runs in any modern browser on Android and iOS with nothing to install, and you can watermark an image straight from your camera roll.
Is the Watermark tool free?
Yes. Watermark with Pixpoo is completely free — no sign-up, no watermark and no usage limits on the free tier.
Related image tools
Resize · Crop · Compress · Convert · All image tools