Upscale Image
Make a picture bigger without the soft,
blurry edges a plain stretch gives you.
7 easy ways to add an image
Add an image from anywhere. Fast, simple and flexible.
- 1Drag & dropDrop your image right here
- 2Choose from deviceBrowse your computer
- 3Copy & pasteCopy an image from a webpage or screenshot and paste it here
- 4Google DriveImport from Google Drive
- 5DropboxImport from Dropbox
- 6From LinkPaste an image link (URL)
- 7Scan QR CodeUpload from your mobile
How to upscale an image online
- Add the picture you want enlarged. It is read in your browser first, so its size is known before anything is sent.
- Pick a factor, or set an exact width and height under Custom.
- Check the size you are actually going to get, then press Upscale Image.
- Drag the handle on the finished screen to compare, then download.
Want a more detailed walkthrough? Read the full step-by-step guide →
Upscale an image online — free, fast and no watermark
Free online image upscaler — enlarge any photo 2× or 4× using Lanczos resampling, the sharpest way to scale an image up without inventing detail. Ideal for small thumbnails, old scans and undersized source files. No sign-up, no watermark.
How your image is processedYour image is uploaded to our server once for processing. It is held temporarily in memory only for the duration of the operation and is not permanently stored. The processed file is then returned to your browser. Our PDF tools work differently: those run entirely in your browser and upload nothing.
About Upscale
Enlarging an image asks software to produce pixels that were never recorded. There is no way round that: a 400-pixel-wide photograph contains 400 pixels of information, and any bigger version has to fill the gaps by reasoning about the neighbours. What separates a good enlargement from a bad one is entirely how that reasoning is done.
The commonest methods are crude. Nearest-neighbour repeats pixels and gives you visible blocks; bilinear averages the four nearest and gives you mush. Lanczos, which is what this tool uses, weighs a wider neighbourhood with a windowed sinc function — it holds edges together and keeps fine texture from dissolving, which is why it is the default in most serious image software and why an enlargement here looks noticeably crisper than the same job done by a browser or an office suite.
What it does not do is invent detail. If the original never captured the weave in a jacket, no amount of resampling will produce it. Enlarging buys you a bigger, cleaner version of the information you already have — worth a great deal when something downstream needs more pixels, and worth nothing if you were hoping to read a number plate.
When enlarging is worth doing
Whenever something needs more pixels than you have, and a soft result beats no result.
- A thumbnail or web-sized image that has to appear larger than it was saved.
- An old scan or a photo from an early phone, being reused at a modern size.
- A supplier’s product shot that is smaller than your layout needs.
- A logo or graphic that only exists as a small raster file.
- A crop that came out tighter than intended and is now short of pixels.
Upscale options explained
One decision, and one number worth reading before you commit: the size the tile says you will get, which on a large photograph is not the factor times the original.

Upscale Factor
Three fixed factors and a custom option. Each tile carries the dimensions that factor produces for the picture you loaded, so the choice is made against real numbers rather than a multiplier. The proportions are always kept.
Start at 2× and look at the result before reaching for more. Enlargement quality falls away as the factor rises, because more of the final picture is inferred rather than recorded: at 2× three-quarters of the pixels are new, at 4× fifteen-sixteenths, and at 8× sixty-three sixty-fourths. If a specific pixel size is what you actually need, Custom is the honest route — it goes straight to that size instead of getting there by a factor that overshoots.

What the tiles do when the ceiling bites
Results are held to 8000 pixels on the longest side. Rather than print a size it cannot deliver, a tile that runs into that ceiling shows the size you will really get and says what factor that works out at. A 3000 × 2000 photograph asked for 4× returns 8000 × 5333, which is 2.7×, not the 12000 × 8000 the arithmetic implies — and 8× returns exactly the same file.
Read it whenever the picture is already large. It is the difference between choosing 8× believing you will get it, and seeing that 4× and 8× are the same answer for this image. On a picture already at 8000 px every tile is disabled and the button is off, because there is nothing to be gained.

Custom size
An exact width and height instead of a factor, in pixels of the output. Keep ratio derives the second number from the first so the picture is never stretched; turn it off and the box is filled exactly as typed. The same 8000-pixel ceiling applies.
When a form, a print spec or a layout has told you the number. Going to 3000 px directly is better than taking 4× and getting 3200 — fewer invented pixels for the same finished size.

Estimated Result
The size you are going to get, and roughly what it will weigh. The dimensions are exact — they are the server’s own arithmetic. The file size is a range, because how much an enlarged file weighs depends on the picture: measured across four kinds of image, the bytes tracked the pixel count raised to a power between 0.64 and 0.86.
Read the dimensions to check the job, and the range to check it will fit wherever it is going. A single number here would be a guess wearing a suit — the spread between a smooth image and a noisy one is close to twofold at the same size.
Comparing the result
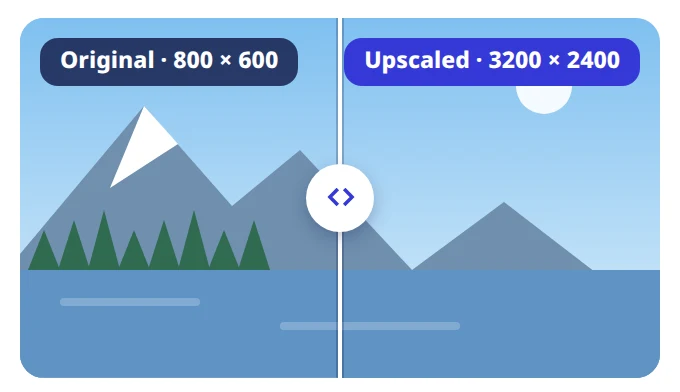
The finished screen puts the original and the enlargement under one draggable divider, each labelled with its pixel size. Drag it, or focus it and use the arrow keys.
Always, before you download. Enlargement is the one operation where the honest answer is sometimes “this did not help” — a soft original comes back softer and larger, and the wipe is where you find that out rather than after you have used the file.
Why use Pixpoo for Upscale?
- Three factors — 2×, 4× and 8× — or a custom width and height of your own.
- Every factor tile shows the size you will actually get, not the size the arithmetic implies.
- Lanczos resampling — sharper than the bilinear scaling most software falls back on.
- A before-and-after wipe on the finished screen, so you can judge the result against the original.
- The output format follows your original, so a JPEG stays a JPEG.
- Camera and location data are dropped on the way through.
Upscale features
Upscale limitations
Being straight about this one matters more than most. This is a Lanczos enlargement, not a learned model: there is no AI reconstructing detail, and the screen does not offer a model to pick because there is none. Enlarging cannot recover detail that was never captured — it produces a larger, cleaner rendering of the information already in the file, not a sharper photograph. Text that is illegible stays illegible, a face that is a blur stays a blur, and compression artefacts are enlarged along with everything else, which is why a heavily compressed source enlarges badly. There is no denoising or sharpening pass, so a grainy original comes back grainy at a larger size. Every result is capped at 8000 pixels per side, which means the larger factors quietly become the same answer on a big photograph — the tiles say so rather than hiding it. Images go through one at a time, up to 25 MB, and HEIC files from recent iPhones cannot be read. The enlargement is computed on a server rather than in your browser, so the file does travel.
Common Upscale questions
How do I make an image bigger without losing quality?
Strictly, you cannot — enlarging always means inventing pixels, so the result is softer than a photograph taken at that size. What you can do is invent them well. This tool uses Lanczos resampling, which weighs a wide neighbourhood rather than averaging the nearest few, and holds edges and texture together far better than the scaling built into a browser or an office suite. Start at 2×, and check the before-and-after wipe on the finished screen.
Why does 8× give me the same file as 4×?
Because both ran into the 8000-pixel-per-side ceiling. On a 3000 × 2000 photograph, 4× would be 12000 × 8000 and 8× would be 24000 × 16000 — both past the limit, so both come back as 8000 × 5333. The tiles show that size and label it “capped”, so the two are visibly the same answer before you press anything rather than after.
Does this use AI to upscale?
No. It is a Lanczos resize — a well-regarded resampling method, and a considerable step up from bilinear scaling, but not a model that has learned what skin or brickwork ought to look like. That distinction matters: a learned upscaler can hallucinate plausible detail into a blurry photo, and this will not. What you get back is a larger, cleaner rendering of exactly the information your file already holds.
What is the largest image I can produce?
8000 pixels on the longest side. That is roughly a 42-megapixel picture at 4:3, comfortably past what a print shop will ask for. A picture that is already 8000 px cannot be enlarged here at all, and the screen disables every tile and the button rather than returning your file unchanged and calling it a result.
Should I use a factor or a custom size?
Use Custom whenever you know the number you need. Going straight to 3000 px is better than taking 4× and landing on 3200: the finished size is what you asked for, and fewer pixels were invented to get there. The factors are for when “bigger” is the requirement and the exact figure does not matter.
How big will the enlarged file be?
Bigger, but not in proportion to the pixel count — an enlarged picture is smooth where the original was detailed, so it compresses better per pixel. Measured across smooth, noisy, high-contrast and photographic images, the bytes tracked the pixel ratio raised to a power between 0.64 and 0.86. That spread is why the screen prints a range rather than a single number: at 4×, a 500 KB file landed anywhere between about 2.9 MB and 5.3 MB depending on the picture.
Will upscaling fix a blurry photo?
No, and this is the honest limit of the tool. Blur is missing information, and enlarging has nothing to reconstruct it from — you get a larger blurry photo. The same goes for camera shake, heavy JPEG artefacts and noise, all of which are magnified along with everything else. The comparison wipe on the finished screen exists partly so you can see that for yourself before committing to the file.
Does upscaling remove my photo’s metadata?
Yes. The enlarged file comes back without the camera make and model, the date or any GPS coordinates — there is no option on this screen to keep them. The rotation tag is read and applied to the pixels before the enlargement, though, so a phone photo comes back upright rather than on its side.
Does it work on a phone?
Yes. The tool runs in any modern browser on Android and iOS with nothing to install, and you can upscale an image straight from your camera roll.
Is the Upscale tool free?
Yes. Upscale with Pixpoo is completely free — no sign-up, no watermark and no usage limits on the free tier.
Are my images uploaded to a server?
Yes. Image Toolkit operations upload the selected image to our server for processing. The file is held temporarily in memory, used only to perform the requested operation, and then discarded. Images are not permanently stored, never written to disk and never shared. Our PDF tools work differently: those run entirely in your browser and upload nothing, so a PDF stays on your device throughout.
Related image tools
Resize · Crop · Compress · Convert · All image tools