A watermark is an argument with itself. Make it visible enough to survive a crop and it spoils the picture; make it discreet enough to ignore and it is trivial to remove. Every setting in a watermark tool is really a position on that spectrum, and the right position depends entirely on whether you are signing a portfolio piece or stamping a proof nobody should publish.
Pixpoo's watermark editor is unusual in one respect worth knowing before anything else: for the common output formats it never sends your picture anywhere. This is a walkthrough of every control, what it does to the file you download, and the numbers behind the defaults.
Add a watermark nowText and logo layers, nine positions, tiling and rotation. Free, no sign-up, no watermark from us.Open Watermark Image →
Where the work happens, and why it matters
Most online image tools upload your file, process it on a server and send it back. This one mostly does not. When the output is PNG, JPEG or WebP, the picture is drawn onto a canvas inside your own browser at full resolution, the mark is composited there, and the encoded result goes straight to your downloads folder.
We did not take that on faith. Running a complete watermark-and-download cycle in an instrumented browser, counting every outbound request:
| Output format | Where it is encoded | Network requests |
|---|---|---|
| PNG, JPEG, WebP | Your browser | 0 |
| AVIF, GIF, TIFF, JPEG 2000, JPEG XL | Pixpoo's server | 1 upload |
Browsers can only encode those first three formats. For the others, the already-watermarked image is flattened to PNG and sent to be re-encoded, then returned — held in memory, never stored. So if it matters that a picture never leaves your machine, the rule is simple: stay on PNG, JPEG or WebP.
There is a side effect worth knowing. A canvas holds pixels and nothing else, so the EXIF block — camera model, timestamp, GPS coordinates — has nowhere to survive. We put a photo carrying location tags through and the download contained no metadata block at all. That happens automatically here, with no checkbox to forget.
Step 1 — Start from a preset
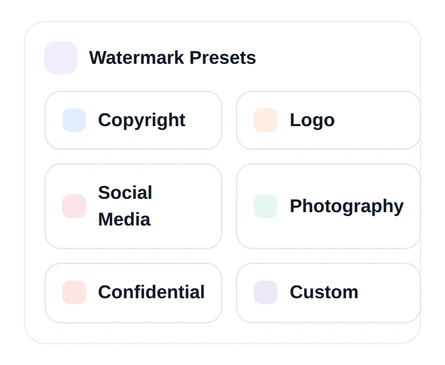
Six starting points, each setting text, opacity, size and position together:
| Preset | Mark | Opacity | Position |
|---|---|---|---|
| Copyright | © Your Name | 60% | Bottom right |
| Logo | your uploaded image | 70% | Bottom right |
| Social Media | @yourhandle | 80% | Bottom centre |
| Photography | Photo © Studio | 55% | Bottom left |
| Confidential | CONFIDENTIAL | 35%, tiled, −30° | Centre, everywhere |
| Custom | whatever you type | yours | yours |
The spread between Photography at 55% and Social Media at 80% is the working range for most photographs. Confidential sits deliberately outside it — low opacity, but tiled across the entire frame, which is a completely different intent. One is a signature; the other is an obstruction.
Step 2 — Two layers, both live
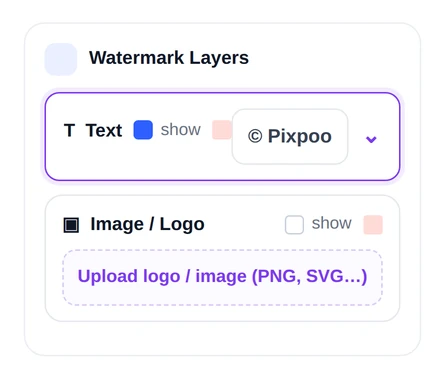
The text mark and the logo mark are separate layers that coexist on the picture. Each has its own visibility tick, its own delete button, and its own full set of position and style values. Clicking one moves the controls onto it; it does not switch the other off.
Most jobs want one or the other. Use both when a logo and a line of type belong on the same picture but not in the same corner — a mark bottom-right, a studio credit bottom-left. For the logo layer, upload a PNG with a transparent background wherever you can. A logo saved as JPEG brings its white rectangle with it and sits on your photograph like a sticker.
Step 3 — Opacity, size and tiling
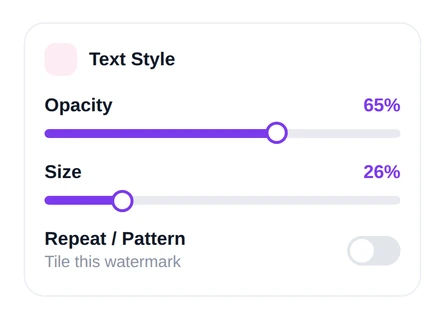
Size is a percentage of the picture's width, which is the detail people misjudge. On a 3000-pixel-wide photograph, a setting of 20 produces a mark 600 pixels across — already substantial. Because it scales with the image rather than being a fixed pixel size, the same setting behaves sensibly whether you are marking a thumbnail or a print master.
Opacity between 50% and 70% is legible without dominating on most photographs. Pale or minimal images need less than you expect; a mark at 65% on a white studio background reads far louder than the same mark on a dense landscape.
Repeat / Pattern is not a stronger version of the same idea — it is a different job. It tiles the mark edge to edge across the whole picture, which is what you want on a client proof and never what you want on a portfolio image. Because the mark is everywhere, tiling ignores the position and edge-distance settings entirely.
Step 4 — Placing it
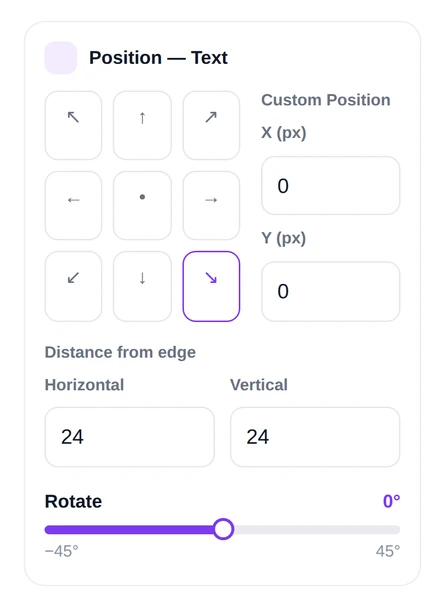
Nine anchors, free dragging, or exact coordinates — dragging switches the layer to custom X and Y automatically. Rotation runs from −45° to +45° around the mark's own centre.
The edge-distance fields deserve a moment. They are measured in the picture's own pixels, not screen pixels, and default to 24. On an 800-pixel image that is a comfortable margin; on a 3000-pixel image it is almost touching the edge. Measuring the bottom-right anchor on a 3000 × 2000 photograph at size 20, the mark landed as a 600 × 192 box at coordinates (2376, 1784) — twenty-four pixels from two edges of a very large picture. If you work across wildly different image sizes, scale that number rather than leaving it.
Mark your own imageComposited in your browser at full resolution — nothing uploaded for PNG, JPEG or WebP.Open Watermark Image →
Step 5 — Choosing the output format
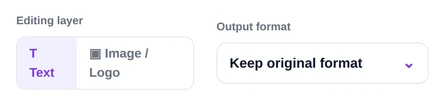
It defaults to keeping your original format, and as covered at the top, this choice also decides whether the file stays on your machine. WebP for anything going online, JPEG for maximum compatibility.
One trap: do not choose PNG for a photograph here. Browsers write PNG at full colour depth with no palette reduction, so our 3.6 MB test photograph came back as a 16.5 MB file. PNG is the right answer for a screenshot or a graphic; on a photograph it is nearly five times the weight of the original for no visible gain.
Step 6 — Quality, size ceiling and filename
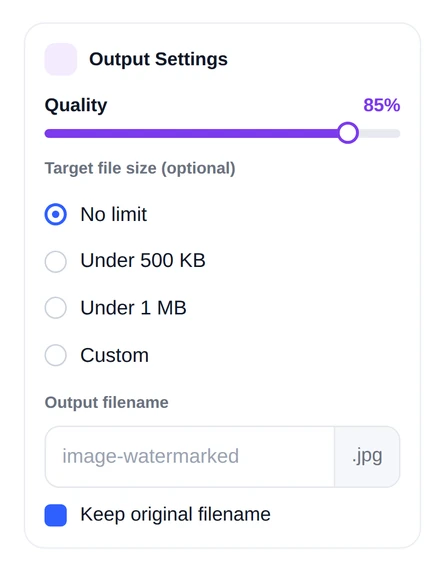
Quality defaults to 85, which is a sound setting for photographic work — our marked test image came out at about 2.1 MB as JPEG and much the same as WebP.
The file-size ceiling encodes repeatedly and returns the largest version that still fits underneath the figure you name. We checked that it really finds the best available rather than merely something that fits, by sweeping all one hundred quality levels and comparing:
| You ask for | You get | Quality used |
|---|---|---|
| Under 1 MB | 971.7 KB | 60 |
| Under 500 KB | 497.8 KB | 29 |
| Under 200 KB | 191.0 KB | 11 |
| Under 100 KB | 99.2 KB | 6 |
Across sixteen different ceilings it picked the optimum every time. Two boundaries remain: it cannot go below what the lowest quality setting produces — on this picture that floor was about 53 KB, so a 40 KB request is refused by arithmetic — and it does nothing for PNG, which has no quality dial to search.
The filename keeps your original by default with -watermarked appended, which is usually what you want when the marked copy sits beside the original in a folder.
Choosing a setup for the job
A portfolio photograph
Copyright preset, bottom-right, opacity around 55–60%, size no more than 15%. The mark should be findable, not noticeable. Export as WebP.
A client proof
Confidential preset, or your own text with Repeat turned on. The point is that the picture is unusable until paid for, so let the mark obstruct.
A social post
Social Media preset, bottom-centre at 80%. Feeds crop aggressively at the edges, so centre it and keep it away from the corners.
Branded product shots
Logo layer with a transparent PNG, around 70% opacity, size 12–18%, bottom-right. Set exact coordinates rather than dragging so every shot in the set matches.
An internal document or mock-up
Tiled text at low opacity and a slight tilt. Angled marks are noticeably harder to remove cleanly than horizontal ones.
What it will not do
- It is a deterrent, not protection. A corner mark crops off in seconds and a light one can be painted out.
- No font or colour picker. Text is drawn in white with a soft shadow; use the logo layer for a specific look.
- Tiling overrides placement. Position and edge distance no longer apply once the mark covers everything.
- One picture at a time. There is no batch queue.
- The size ceiling skips PNG and cannot beat the lowest quality setting.
Common questions
Is my photo uploaded?
Not for PNG, JPEG or WebP — we measured zero network requests through a full run. Only the less common formats are sent away to be encoded, and even then nothing is stored.
What opacity works best?
50–70% for most photographs. Lower on pale or sparse images, where an identical setting reads much louder.
Can I use my own logo?
Yes — upload it to the image layer, ideally a PNG with a transparent background, and it gets the same position, size, opacity and rotation controls as the text.
Will my EXIF and GPS data survive?
No. The picture is redrawn onto a blank canvas, which carries pixels and nothing else, so metadata is dropped automatically.
Can someone remove the watermark?
Yes, with effort. Watermarking raises the cost of casual theft and keeps attribution attached to the picture; it is not a lock, and it is worth being clear-eyed about that.
Is there a limit on how many I can do?
No — free to use as often as you like, no account, and nothing of ours stamped on your result. One image per pass.
The rest of the image toolkit
- CompressBring the weight down once the mark is in place.
- ResizeSet the pixel dimensions before marking, so the mark scales with them.
- CropFix the framing first — cropping afterwards can cut the mark off.
- ConvertChange format on its own, with nothing else applied.
- UpscaleEnlarge a picture that is too small to carry a legible mark.
- Background removalProduce the transparent logo file the image layer wants.