Cropping is the only image tool that changes what the picture is rather than how big it is. This is the whole tool explained — the selection box, the seven shapes, the composition grids, and what the rotate and flip buttons actually do to the file you get.
Open the Crop Image tool — free, no sign-up, no watermark.
Crop, resize, compress: three different things
Cropping removes part of a picture. That separates it from resizing, which keeps the whole frame and redraws it smaller, and from compressing, which keeps every pixel and spends fewer bytes on them.
Two jobs bring most people here. The first is composition: a distracting edge, a subject sitting too far from where the eye wants it. The second is shape: a platform that wants a square, a 16:9 banner or a 9:16 portrait, and a photograph that is none of those.
Everything is measured in the pixels of your original, so a crop is exact rather than approximate. Your original is never modified — which matters, because a crop cannot be undone from the result.
Step 1: add your image
 The file is read in your browser first, so the selection box appears before anything is sent.
Accepted formats are JPG, PNG, WebP, AVIF, GIF and TIFF, up to 25 MB.
Step 2: crop and adjust
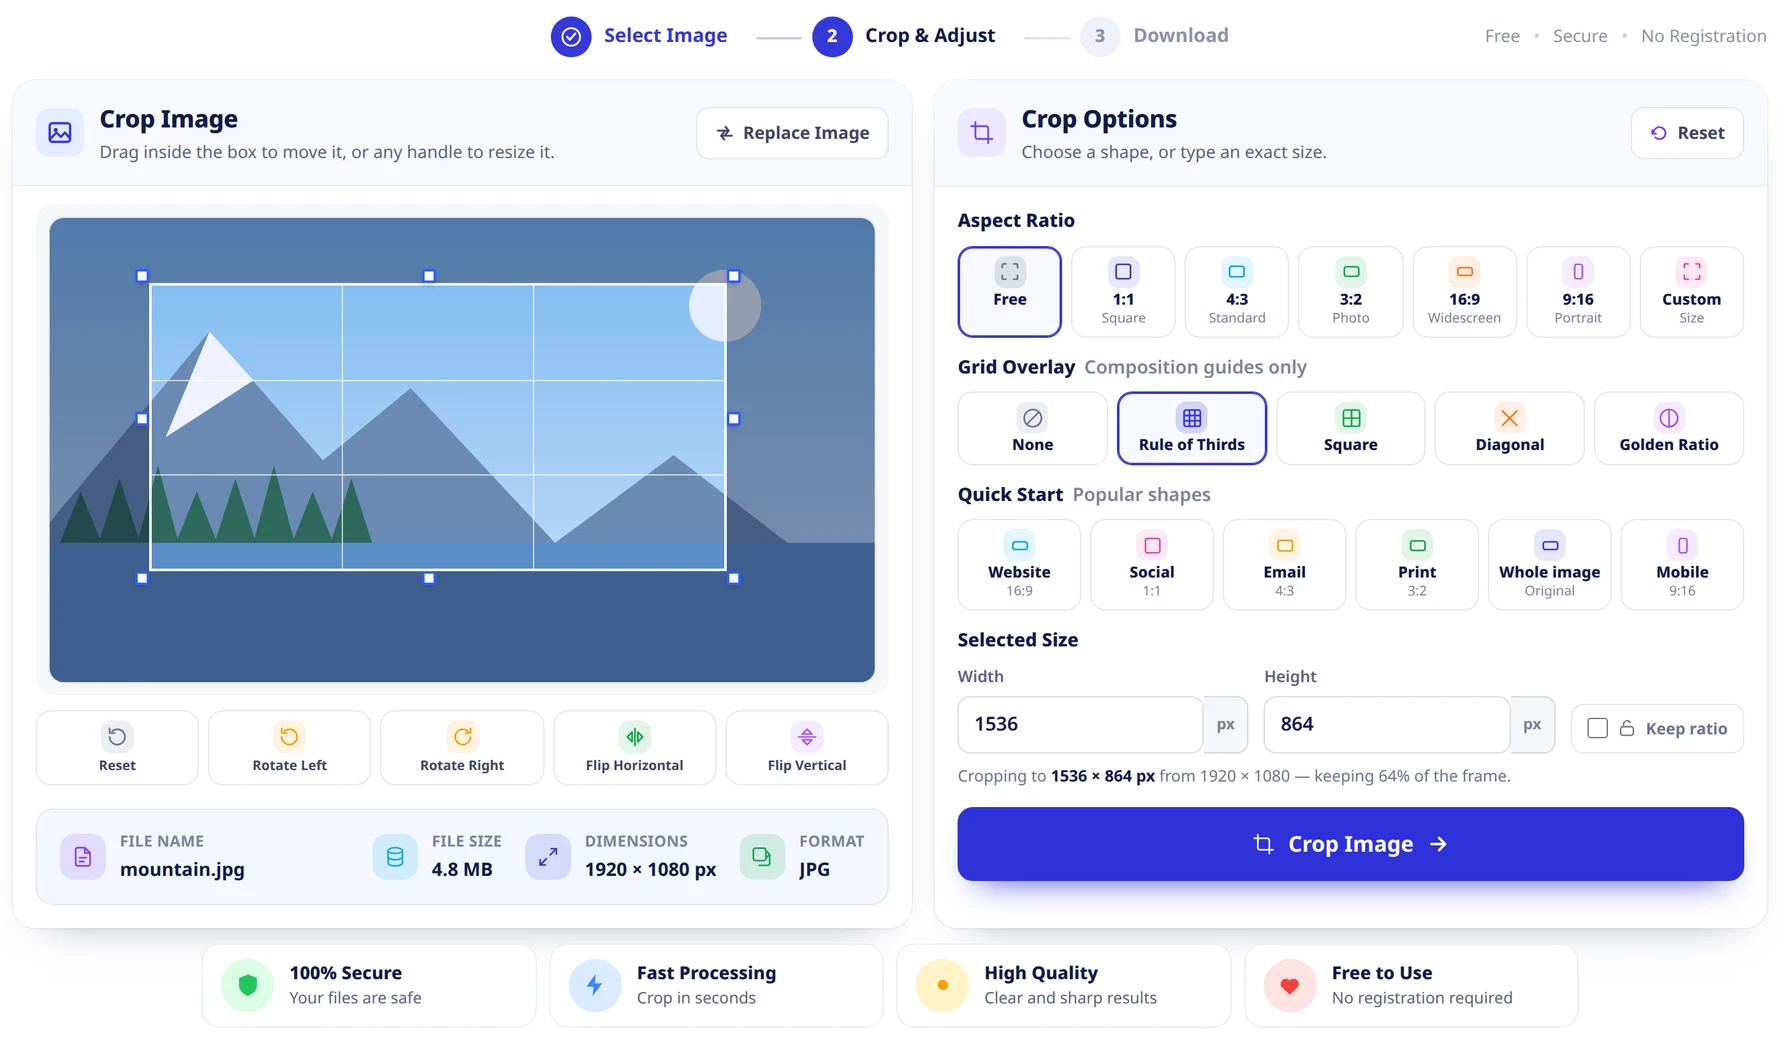
The picture is the control here. The box on it is what gets kept, and everything on the right either constrains that box or measures it. Nothing is applied until you press the button, so a shape you try is free to undo.
The selection box
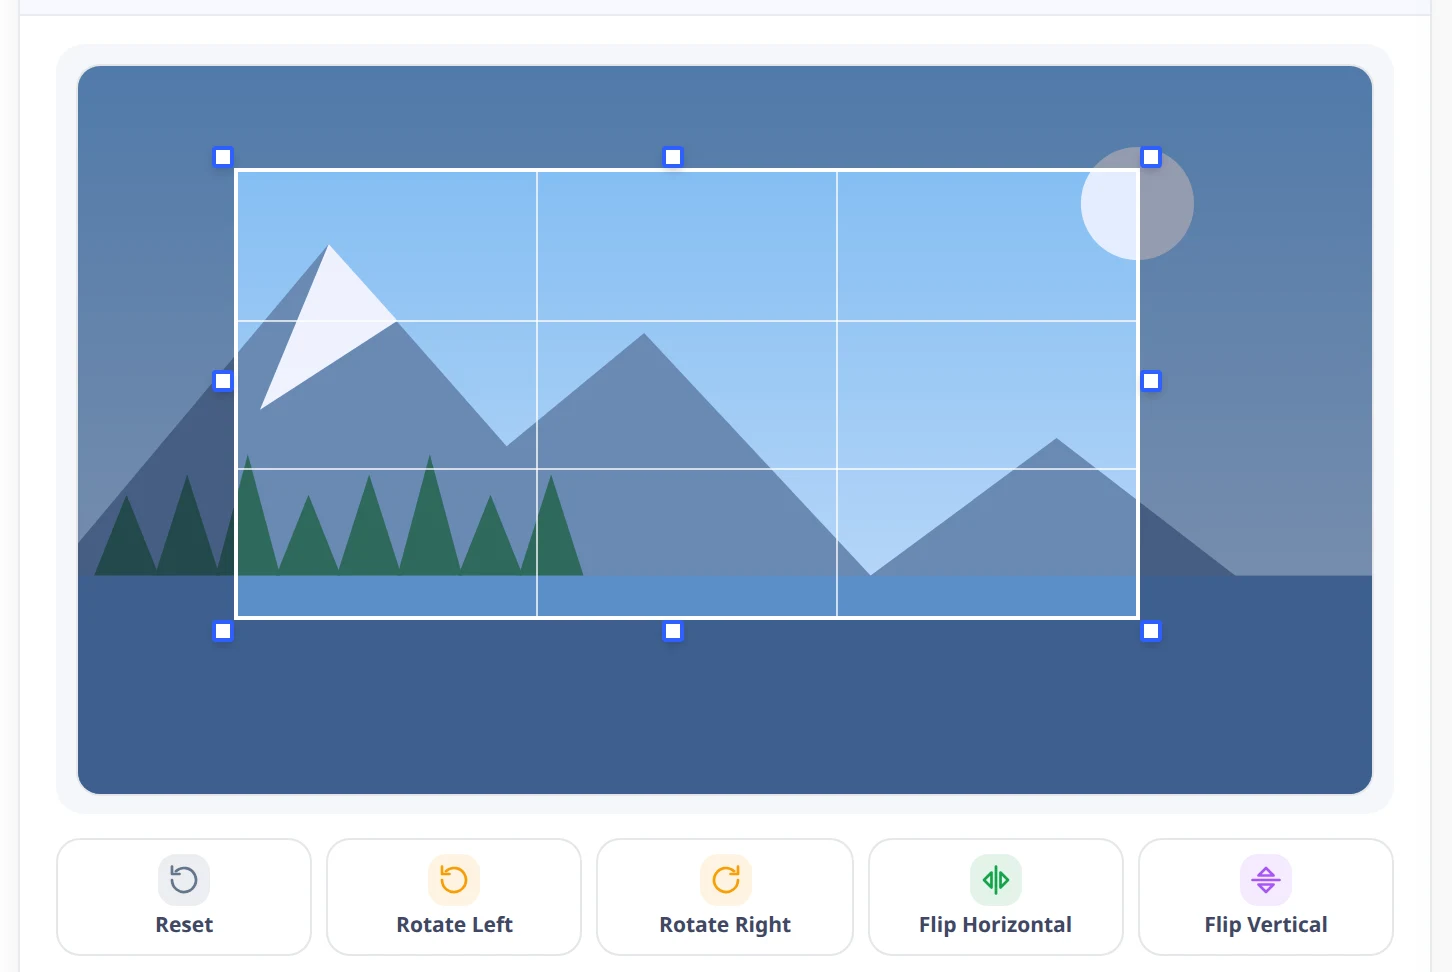
Drag inside the box to move it, or any of the eight handles to resize it. Drag on empty space to draw a new box from scratch. Arrow keys nudge the selection by one per cent of the image; Escape resets it to a centred box.
Aspect Ratio
 The current selection snaps to the shape immediately, rather than waiting for your next drag.
Pick the ratio the destination demands, then move the locked box to frame the picture — much quicker than trying to drag an exact 16:9 by hand. With a ratio set, typing a width below recalculates the height.
Grid Overlay

Guidelines drawn inside the selection, and a drawing aid only — nothing about the grid reaches the file you download. Thirds for most photographs: horizon on a line, subject on an intersection. Square is a centre cross for symmetry. Diagonal helps line up along a leading line. Golden Ratio is a tighter version of thirds.
Quick Start

Six shapes for the jobs people arrive with. Whole image is the exception: it clears the ratio and puts the box around the entire frame, which is the honest meaning of "keep everything".
Selected Size
 The line underneath is the one to watch before you commit.
The selection in pixels of your original, editable directly. Type here when a form demands exact numbers. Watch the percentage: a crop that keeps a small part of a large photograph gives you a small picture, and enlarging it afterwards cannot put the detail back.
Rotate and flip

Rotate Left and Rotate Right turn the picture in 90° steps; the two flip buttons mirror it. Reset clears every transform and puts the box back to a centred one.
The selection box turns with the picture, so it keeps framing the same part of the photograph however you turn it. That is doing real work: the crop is always measured against the image as it arrived, because the server extracts your selection first and rotates the result afterwards. Turning the box alongside the picture keeps the two in step, so what you frame is what you get.
Step 3: download
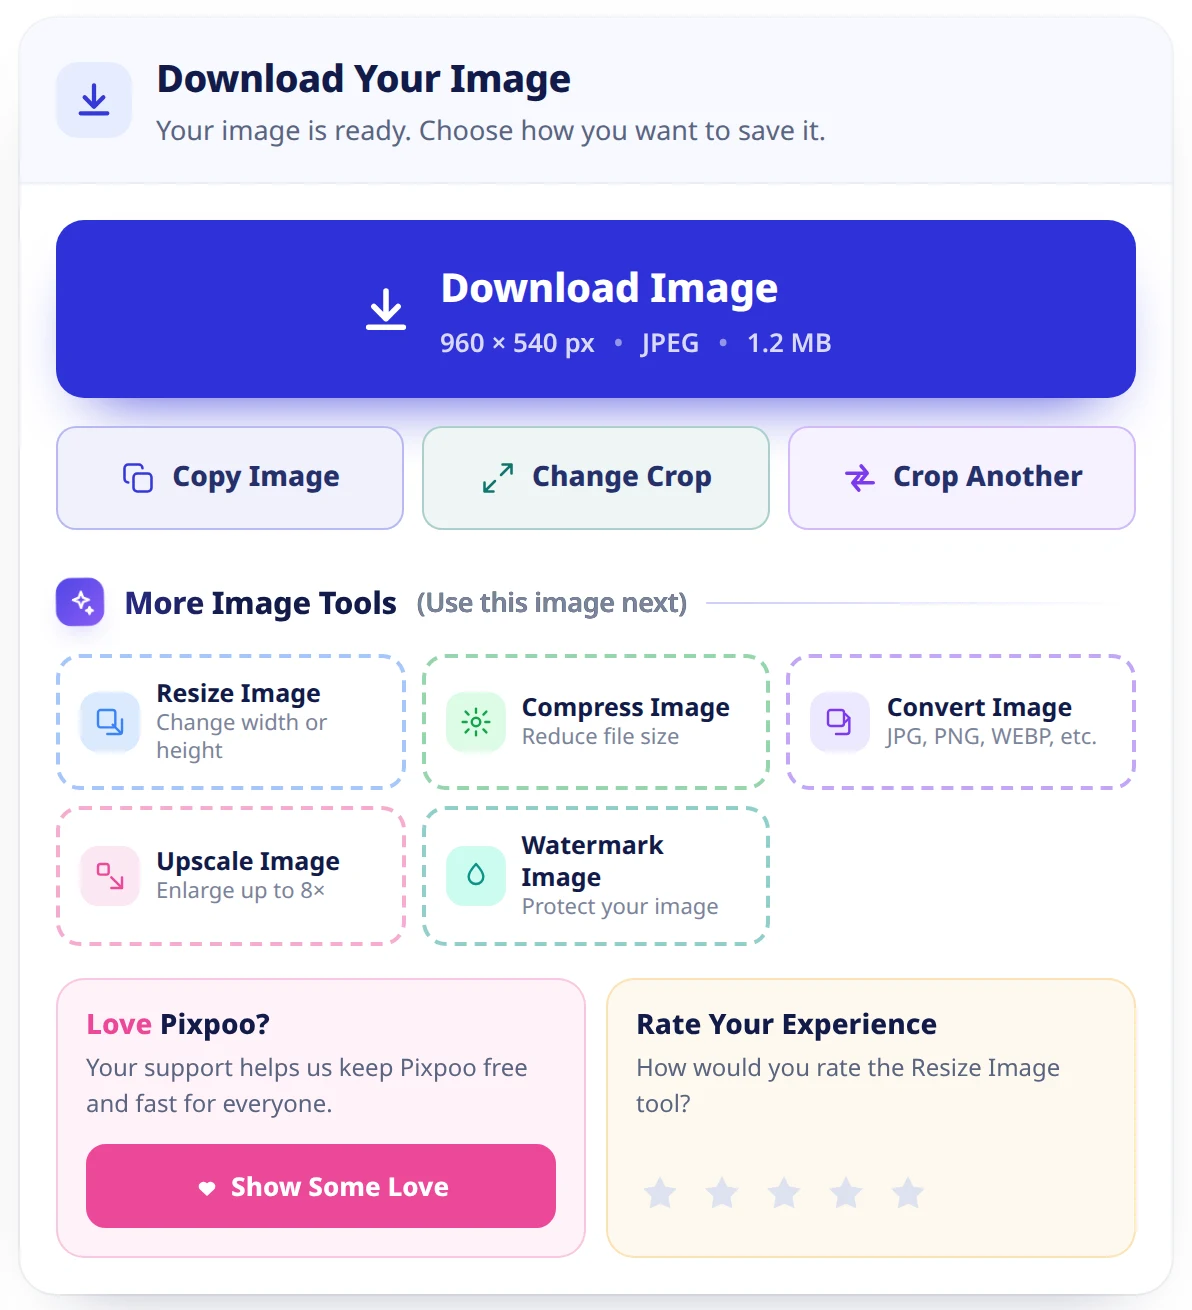
Change Crop goes back to the selection with the same picture still loaded, so trying a different framing costs nothing. The tiles below pass the cropped image to Resize, Compress, Convert, Upscale or Watermark.
Where the honest edges are
A crop is subtraction. The pixels outside the box are not in the file you download, and no amount of enlarging afterwards puts that detail back — keep your original. Cropping hard into a small photograph leaves you with a small photograph.
There is no straighten control on this screen. Rotation is in 90° steps only, so a horizon that leans by a degree or two cannot be corrected here — straighten it in a photo editor before cropping.
The picture is cropped on a server rather than in your browser, so the file does travel; it is processed and returned straight away, never written to disk and never shared. Images go through one at a time, the upload ceiling is 25 MB, and iPhone HEIC files are refused.
Common questions
How do I crop an image to an exact size?
Type the numbers into the Width and Height boxes under Selected Size — they are in pixels of your original, so the result is exact. If a shape matters more than the numbers, pick an aspect ratio first and the box holds that shape while you drag it.
How do I crop a photo to a square?
Press the 1:1 tile, or the Social quick start, which sets the same thing. The selection snaps to a square immediately and stays square however you resize it.
What is the rule of thirds grid for?
It divides the selection into nine, and the convention is to put the horizon on a horizontal line and your subject on an intersection rather than dead centre. The lines are never written into the file you download.
Does cropping reduce image quality?
Not in the sense of blurring anything — the pixels that survive are the original pixels, untouched. What changes is how many of them there are. Crop to a quarter of the frame and you have a quarter of the pixels. The percentage under the size boxes tells you where you stand before you press.
Can I undo a crop?
Not from the downloaded file. Your original is never modified, though, and Change Crop on the finished screen returns you to the selection with the same picture still loaded.
Does the picture turn when I press rotate?
Yes, and the selection box turns with it, so the box keeps framing the same part of the photograph. Underneath, the crop is measured against the image as it arrived — the server extracts your selection first and rotates the result afterwards — and turning the box alongside the picture is what keeps the two in step.
Can I straighten a tilted horizon?
Not here — rotation is in 90° steps. That handles a photo that came off the camera sideways, but not one that leans slightly.
Does cropping remove EXIF and GPS data?
Yes. Camera model, date and location tags are stripped from the file you download.
What is the difference between cropping and resizing?
Cropping throws part of the picture away and keeps the rest at its original scale. Resizing keeps the whole picture and redraws it at a different pixel size. If the frame is wrong, crop; if the frame is right but the file is too big for its slot, use Resize Image.
Try the Crop Image tool, or browse the rest of the Image Toolkit.